 knacksnews
Effortless Ways to Place Videos Side by Side on Your Computer
Advertisement
Have you ever wanted to take two videos and display them side by side? Whether you're creating a comparison video, crafting engaging social content, or presenting a before-and-after transformation, mastering this technique can open up endless creative possibilities. The great news is that you don’t need to be a video editing expert to achieve this. This guide will walk you through easy, step-by-step methods to place videos side by side on your computer, using tools that are simple yet effective.
Reasons to Place Videos Side by Side
Creating side-by-side videos can serve a variety of purposes in projects across personal, professional, or creative domains, including:
- Comparison videos – Whether you're analyzing two products, testing features, or showing progression, this format makes it easy to juxtapose visuals together.
- Interactive storytelling – Split-screen storytelling adds an engaging layer to your visual narrative as two perspectives unfold simultaneously.
- Before and after views – Fitness progress, home renovations, or photo editing transformations are incredibly satisfying when shown side by side.
Tools to Use for Placing Videos Side by Side
There are multiple user-friendly tools out there for combining videos into one frame. Here's a rundown of some options:
- iMovie (Mac) – Sleek, intuitive, and perfect for beginners on a Mac.
- Windows Video Editor – Free and pre-installed on Windows 10.
- Online tools (like Kapwing or Canva) – No download necessary, and great for quick tasks.
- Advanced tools (like Adobe Premiere Pro or DaVinci Resolve) – Perfect if you're looking for professional-grade results.
With these tools at your disposal, let's explore how to actually combine videos.
Step-by-Step Guide to Placing Videos Side by Side
1. Using iMovie (Mac Users)
iMovie is an excellent option for Apple users, as it’s not only free but includes all the features you need to edit two videos into one.
Here’s how to do it:
- Open iMovie and create a new project. Drag both videos into your timeline.
- Select the video you want to adjust, then click on the “Overlay” settings.
- From the drop-down menu, choose the “Split Screen” option.
- Adjust the position of each video to display them evenly side by side.
Once this is done, export your project to save the finished side-by-side video. iMovie makes this simple with its export options tailored for mobile or desktop viewing.
2. Using Windows Video Editor (PC Users)
If you’re on Windows, you already have a built-in editor that can handle basic video tasks. While not as advanced as iMovie, it’s still effective for simpler editing.
Steps:
- Launch Windows Video Editor (search for “Video Editor” in the search bar).
- Create a new project and add both videos to your storyboard.
- Unfortunately, Windows Video Editor doesn’t explicitly include a “split screen” tool. To achieve side-by-side formatting, you may need to create white borders manually or move to other tools like online editors if precision is needed.
This method works well for basic needs but can feel limited for more professional results.
3. Online Editors (Kapwing, Canva, or VEED)
If you’re not ready to download software, online tools are a great alternative. They’re perfect for quick edits and often include templates for split screens. Kapwing, Canva, and VEED are particularly popular.
Here’s how to do it on Kapwing:
- Go to Kapwing.com and click “Start Editing.”
- Upload both videos to the workspace.
- Adjust each video’s size and position to fit next to each other in the editable frame.
- Export and download your new split-screen video.
The best part? Many online editors offer free accounts for beginners.
4. Professional Software (Adobe Premiere Pro or DaVinci Resolve)
For those who need high-quality, professional-grade videos, consider using advanced editing software. While they come with a learning curve, platforms like Adobe Premiere Pro are excellent for precise control and customization.
How to do it with Premiere Pro:
- Import both videos into your project timeline.
- Pull each video into a separate video track.
- Use the Position tools under the “Effects” tab to align each video on either side of the frame.
- Adjust to your desired angles or even add transitions for a seamless presentation.
The level of detail you can achieve with Premiere Pro is unmatched, making it perfect for commercial or professional projects.
Common Mistakes to Avoid
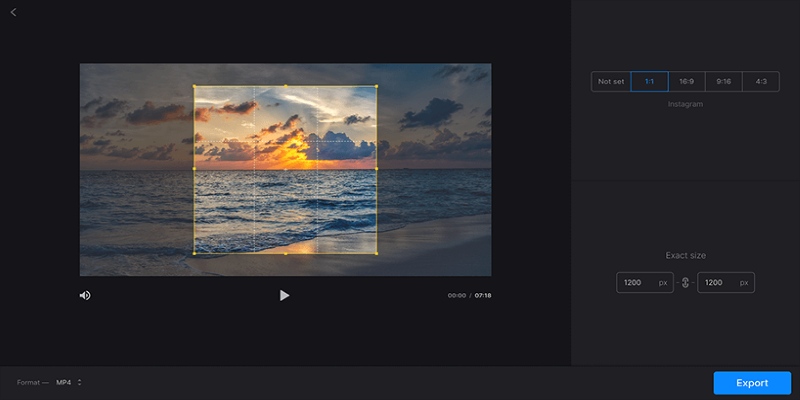
- Not using the right project settings: Always make sure you have the correct settings for your project, such as resolution and aspect ratio.
- Neglecting audio quality: Audio is just as important as video, so make sure to use high-quality audio recordings and adjust levels accordingly.
- Overusing transitions and effects: While they can add interest to your project, overusing them can be distracting and take away from the overall message.
- Forgetting about color correction: Color balance and consistency are crucial for a polished look, so always remember to make adjustments if needed.
Tips for a Polished Side-by-Side Video
- Use high quality equipment and make sure to properly adjust levels for both audio and video.
- Limit the use of transitions and effects to avoid distracting from the main content.
- Consider using B-roll footage or graphics to enhance the overall message if appropriate.
- Pay attention to lighting in both frames, ensuring they are evenly lit and complementary.
- Keep text and other graphic elements readable in both sides of the video.
Final Thoughts
Placing videos side by side has never been more accessible. Whether you’re using iMovie for a quick comparison, an online editor for fast results, or professional software for polished, high-quality production, there’s a tool for every need. Using these tools not only enhances storytelling but also adds a professional finish to your content. From small business use to personal projects, mastering this technique unlocks new creative potential.
On this page
Reasons to Place Videos Side by Side Tools to Use for Placing Videos Side by Side Step-by-Step Guide to Placing Videos Side by Side 1. Using iMovie (Mac Users) Here’s how to do it: 2. Using Windows Video Editor (PC Users) Steps: 3. Online Editors (Kapwing, Canva, or VEED) Here’s how to do it on Kapwing: 4. Professional Software (Adobe Premiere Pro or DaVinci Resolve) How to do it with Premiere Pro: Common Mistakes to Avoid Tips for a Polished Side-by-Side Video Final ThoughtsAdvertisement
Related Articles
Step-by-Step Guide: 4 Ways to Put Two Videos Side by Side

Easy Ways to Create a Video Collage with Music on Your PC or Mac

Top 2 Free Methods to Create Stunning Picture-in-Picture Videos

Top Methods to Record Overwatch Highlights on PC and Consoles

Best AI Tools for Copywriting and Content Creation in 2025

Step-by-Step TikTok Guide: Create a Video Collage Like a Pro

Top Ways to Record Gameplay on Nintendo Switch Without a Capture Card

Top 5 Side-by-Side Video Editing Apps for iOS and Android

How to Make Viral YouTube and TikTok Reaction Videos: Step-by-Step Guide
Crop Videos Free with Best Video Croppers on Windows
Step-by-Step Guide to Combine Video Clips in iMovie Quickly