 knacksnews
Step-by-Step Guide: 4 Ways to Put Two Videos Side by Side
Advertisement
Sideling two videos creates a value-building effect which shows scene comparisons and alternative viewpoints as well as visual creative possibilities. The process of combining two videos proves to be easier than most people assume for entertainment editing as well as professional work and social media posts. Any person at any skill level can smoothly combine videos by using appropriate methods and tools. This guide presents step-by-step instructions for four basic approaches that you can use through accessible tools to perform the task.
Why Use Side-by-Side Videos?
Here’s a quick rundown of why you might want to use this editing style:
- Visual storytelling: Displaying two perspectives or scenarios at once captivates audiences and conveys your message more effectively.
- Comparisons: Great for showing product differences, before-and-after results, or simultaneous events.
- Reactions: Popular with creators, side-by-side videos are often used for live commentary or reaction clips.
- Social media engagement: Split-screen videos grab attention when viewers are scrolling through their feeds, making them perfect for platforms like TikTok, Instagram, or YouTube.
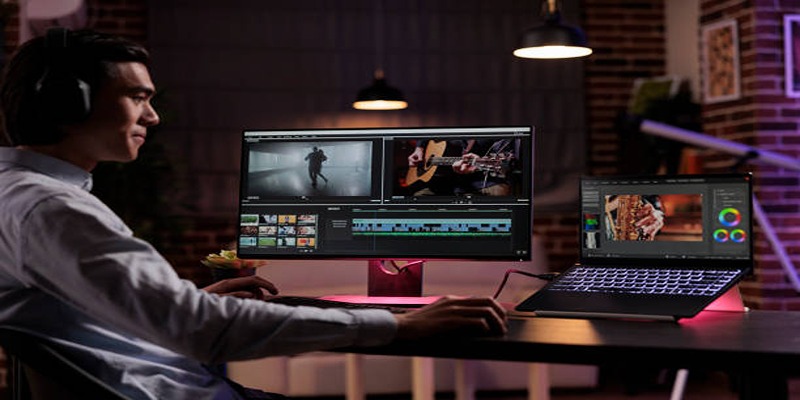
Method 1: Use Video Editing Software
If you’re just starting out, full-featured video editing software is the easiest and most flexible way to create side-by-side videos.
Tools to Use:
- iMovie (Mac)
- CapCut (Mobile/Windows)
- DaVinci Resolve (Mac/PC)
Steps:
- Import Your Videos: Open the software and upload the two videos you want to combine.
- Drag Videos to the Timeline: Place both clips on separate video layers. Most editing software uses a timeline feature for this purpose.
- Resize and Adjust: Shrink each video frame to take up half of the screen. You can drag and reposition the clips to align them side by side horizontally or vertically.
- Add Borders and Edits: Adjust borders or add text for better visuals. For example, you can use a separator line to keep the videos visually distinct.
- Export Your Video: Save your project and export it in your desired resolution (e.g., 1080p for HD quality).
With tools like iMovie or CapCut, this method is beginner-friendly, fast, and free for most users!
Method 2: Try Online Video Editors
Online editors are perfect for quick and straightforward side-by-side video creation. Many of these platforms are browser-based and allow drag-and-drop interfaces.
Tools to Use:
- Kapwing
- Canva Pro
- Clideo
Steps:
- Go to the Online Editor: Open the editor’s website (e.g., Kapwing.com) and upload your video clips.
- Choose a Split-Screen Layout: Most platforms offer pre-designed layouts for side-by-side videos. Select the one that matches your vision.
- Edit and Sync (Optional) : Add adjustments like background colors, subtitles, or transitions. Ensure the two videos are synchronized if timing is important (e.g., for comparison videos).
- Export and Download: Export the finished video and download it straight to your device.
This method is ideal for creators on the go or individuals working from devices with limited storage space. Keep in mind that some platforms may require a subscription for features like watermark removal and higher resolution exports.
Method 3: Use Mobile Apps for Quick Edits
For users creating content from their phones, mobile apps are the way to go. They’re quick, convenient, and packed with features designed for social media creators.
Tools to Use:
- CapCut (iOS/Android)
- Video Collage Maker
- Video Leap (Pro features available)
Steps:
- Download a Video Editing App: Install a trusted app from your app store. CapCut is free and beginner-friendly.
- Select a Collage Option: Use the app's built-in "collage" or "split-screen" feature. This automatically lines both videos side by side.
- Edit as Needed: Add text overlays, stickers, or music to enhance your creation. For aesthetics, choose a uniform color theme.
- Export to Social Media: Most apps allow direct sharing to platforms like Instagram or TikTok.
Mobile apps are perfect for short-form content and quick edits, making this approach ideal for content creators who primarily post on social platforms.
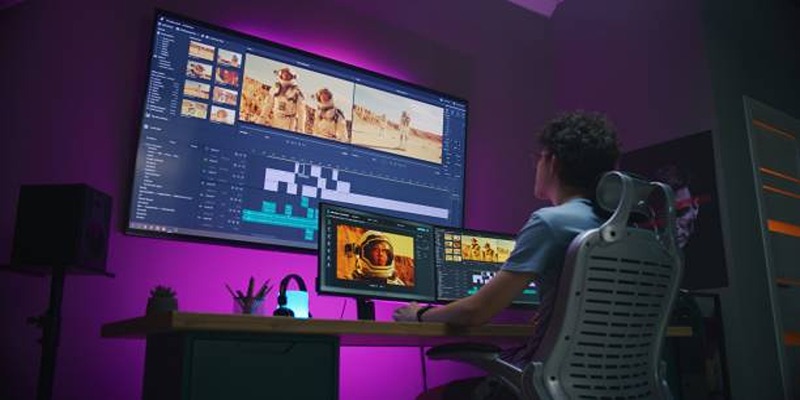
Method 4: Use Advanced Software for Professional Results
Looking for top-tier quality? Professional video editing software provides unparalleled options for precision, customization, and creative flexibility. While these tools come with a learning curve, they are worth the effort for commercial or high-quality projects.
Tools to Use:
- Adobe Premiere Pro
- Final Cut Pro
- Sony Vegas Pro
Steps:
- Import Videos to Your Workspace: Load your video files into the software’s media bin.
- Align the Clips on the Timeline: Drag your clips into layers and position them side by side using the cropping and resizing tools.
- Add Effects & Details: Use professional editing tools to enhance transitions, colors, audio quality, and video alignment.
- Export with High-Quality Settings: Premiere Pro and Final Cut Pro allow you to export videos in formats optimized for web or broadcast.
Tips for the Best Split-Screen Results

Creating side-by-side videos involves more than just placing two clips together. Here are some tips to make your output as engaging as possible:
- Pay Attention to Aspect Ratios: Ensure the final video fits its intended platform. For example, Instagram posts work well with 1:1 ratios, while YouTube prefers 16:9.
- Add Subtitles and Labels: If you’re comparing products or narrating a story, use labels to clarify what each side represents.
- Test and Sync Audio: Achieving professional results often requires coordinating separate audio tracks. Make sure the sound from both videos is clear and synced.
- Preview Your Work on Final Platforms: Before publishing, watch your split-screen video on mobile, desktop, or TV screens to confirm quality across devices.
Conclusion
Whether you’re a content creator, digital marketer, or small business owner, side-by-side videos offer endless opportunities to captivate your audience. From showing off a new product’s features to sharing your personal before-and-after transformation, the split-screen format is versatile and effective. Follow these methods to start creating side-by-side videos with ease. Incorporate engaging visuals, clear audio, and professional touches to make your videos stand out.
On this page
Why Use Side-by-Side Videos? Method 1: Use Video Editing Software Tools to Use: Steps: Method 2: Try Online Video Editors Tools to Use: Steps: Method 3: Use Mobile Apps for Quick Edits Tools to Use: Steps: Method 4: Use Advanced Software for Professional Results Tools to Use: Steps: Tips for the Best Split-Screen Results ConclusionAdvertisement
Related Articles

Step-by-Step TikTok Guide: Create a Video Collage Like a Pro

Top Methods to Record Overwatch Highlights on PC and Consoles

How to Design Stunning Photo Collages with iPhoto on Mac and iPhone

Top 6 AI Voice Generators You Need to Know About

Step-by-Step Guide to Recording HD Videos to DVD for Big Screen Viewing

Top 8 Accounting Software Tools for Self-Employed Professionals

The Best AI Scheduling Assistants for Effortless Planning
Top 2 Free Methods to Create Stunning Picture-in-Picture Videos

The 7 Best Grammar Checkers to Polish Your Writing in 2025
Top 5 Side-by-Side Video Editing Apps for iOS and Android

How to Effortlessly Create a Video Collage on Your iPhone